Apps need data storage. Amazing, right? A popular solution is MySQL. You may be experienced in running your own MySQL server and know the issues of resiliency that are involved with it and the difficulties of increasing storage, CPU, and RAM on a system in production. We’re familiar with those issues too, and have numerous features to improve resiliency. So instead of managing your own MySQL instance, let me tell you about running MySQL on Google Cloud SQL, a fully managed relational database service. Running MySQL on Google Cloud SQL allows you to reduce your administration costs by providing automated maintenance and security and availability features.
I’ll start by explaining how to start MySQL and access it from the command line in Cloud Shell.There’s an interactive tutorial for this that will give the exact steps and even point out which buttons to press. It definitely can be difficult to find the right button when you’re dealing with something new.
Once MySQL is running, I’ll show you how to connect to it from a Compute Engine (virtual machine) instance. And yes, there’s another interactive tutorial to help you with that.
The basic steps are relatively straightforward and can be done in about 10 minutes.
Setting up MySQL
Let’s start by setting up MySQL and using it to create a small database. I’m using the instructions in the “Create a MySQL instance with Cloud SQL” interactive tutorial. All Google Cloud resources are part of a project, so you’ll need to have a project you can use or create one in the Cloud Console.
You’ll also need to enable the Compute Engine and sqladmin APIs. You can do this by going to the Navigation menu and selecting APIs and services and searching for and enabling them there, but the tutorial will do this for you if you’d prefer. It’s useful to do it yourself the first few times, but once you’ve figured out how to enable APIs, it’s just not that exciting, so I let the system do it.
Now let’s create a MySQL instance:
- Using the Navigation menu, navigate to SQL.
- Click Create Instance. (Yes, it’s on the page in two places–either one will work.)
- Select MySQL.
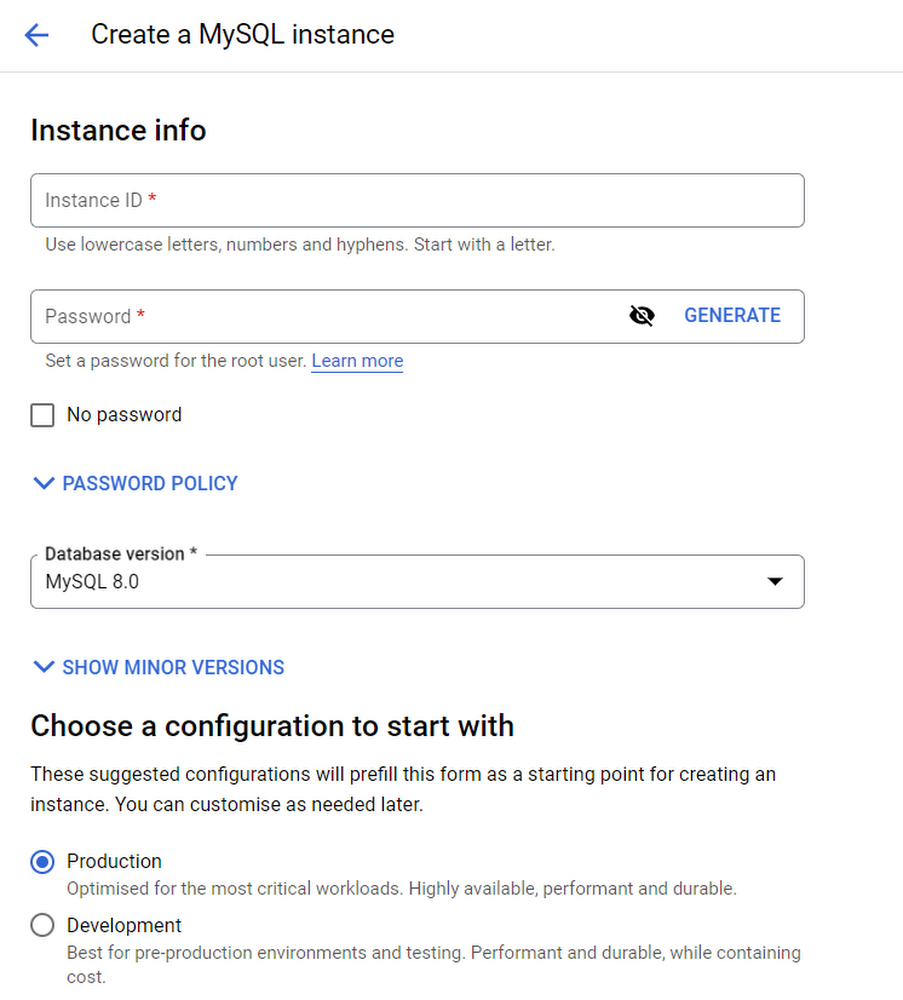
- You’ll see many fields for your instance. Some of these are shown in Figure 1. The only required ones are instance ID and a password. Remember these!
- Click create instance.
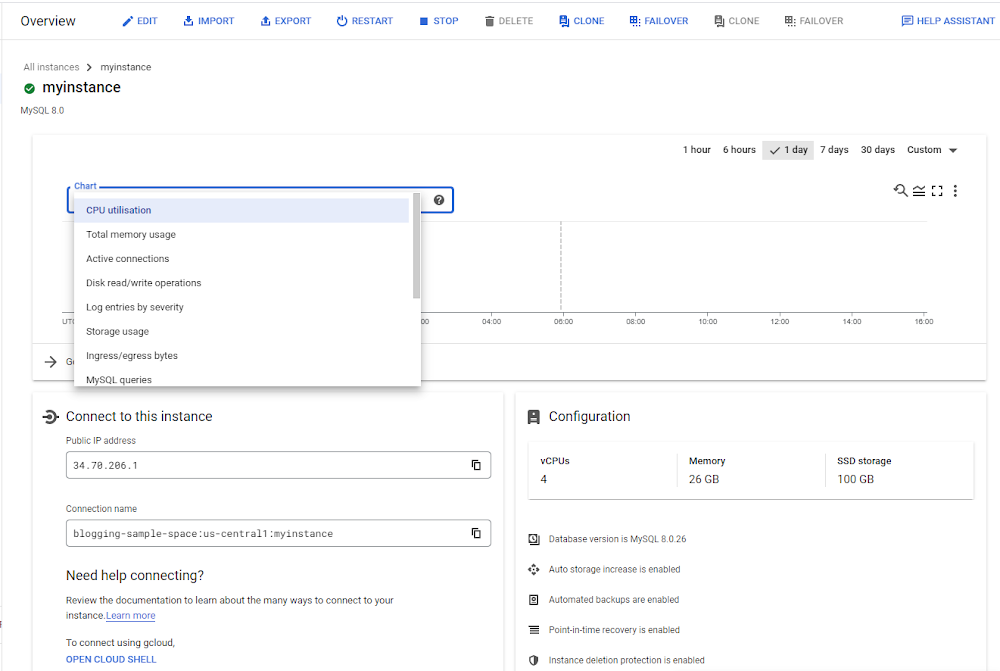
And in a few minutes, you have a MySQL instance, as shown in Figure 2. As the instance is being created, take a look at the information available about the instance on the instance detail page. Save the Public IP address and connection name; you’ll need them later.
So, let’s use it to be sure it’s really there.
Accessing a MySQL instance from the Cloud Shell
Open Cloud Shell. There is an icon at the top of the screen that will do it and a button in the interactive tutorial, but you can also access it from the Connection details of the instance (see the bottom left of Figure 2). Using the option in the Connection details will execute the necessary statement to connect to the instance. For the curious, it’s
gcloud sql connect myinstance --user=root
(where myinstance is your instance’s name). You’ll need to have a project selected for this to work.
You’ll be prompted to log into the MySQL instance. Use the password you used when you created the instance. You should have the mysql> command prompt. Try out the following MySQL commands to create a guest book, add some entries, and view the entries:
CREATE DATABASE guestbook;
- code_block
- [StructValue([(u’code’, u’USE guestbook;rnCREATE TABLE entries (guestName VARCHAR(255), content VARCHAR(255),rn entryID INT NOT NULL AUTO_INCREMENT, PRIMARY KEY(entryID));rn INSERT INTO entries (guestName, content) values (“first guest”, “I got here!”);rn INSERT INTO entries (guestName, content) values (“second guest”, “Me too!”);rnrnSELECT * FROM entries;’), (u’language’, u”), (u’caption’, <wagtail.wagtailcore.rich_text.RichText object at 0x3e59c63f1d90>)])]
Just like that, you’ve got a MySQL instance up and running! But you probably want to access it from somewhere other than the Cloud Shell, so let’s create a VM instance and access it from there.
Creating a VM instance
Let’s change to the second interactive tutorial, “Connect to a Cloud SQL for MySQL instance from a Compute Engine virtual machine,” that will show you how to use Compute Engine to create a VM and connect it to the database. Click Allow HTTP traffic when creating your VM so the database can communicate with it. The default values for everything else are fine.
Once your VM is running, as indicated by a green check mark in the VM instances table, you can move on to reserve an IP address for it.
Reserving a static IP address for your VM
By default, the external IP address for a Compute Engine instance is ephemeral, meaning that while it’s running it will stay the same, but it may change when the VM is stopped. However, the database will need to know which addresses are permitted to connect to it, so you’ll need to request an IP address that will not change (a static address!).
To do this, you’ll go to the Navigation menu > VPC network > IP addresses . You should see the internal and external IP addresses for your VM listed, as shown in Figure 3.
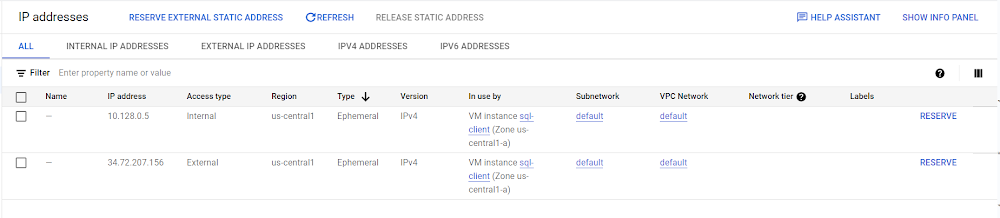
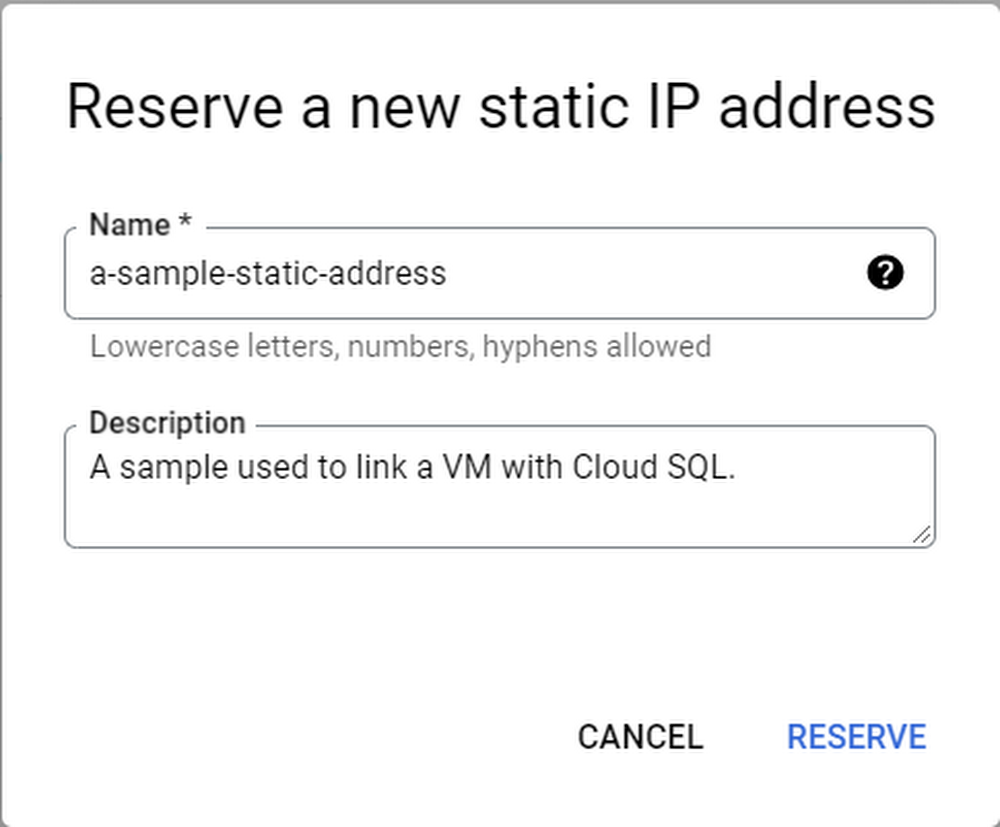
Notice that in the Type column, both of these are currently Ephemeral. To change the External IP address to static, select RESERVE at the end of its row. This will bring up the dialog to reserve an IP address as shown in Figure 4.
Notice that the type of the external address changes to Static when you have reserved the address. You’ll use this address when you connect to the database, so let’s do that now.
Connecting the VM and database
Go to the connection details for your database using Navigation menu > SQL and selecting your database. Then use the Connections, Networking, Add Network to connect to the static IP address. Use a name of your choice and the static IP address you just reserved. Click Done and Save.
Return to your VM. I find it easiest to go to the VM instances page and click SSH to get to the VM. Install MySQL on your VM using the command (and selecting the defaults when prompted):
sudo apt-get update
sudo apt-get install default-mysql-server
You can then use the INSTANCE_IP address (from Figure 2) in the following command to connect to the database. If you set up users other than root, you can use their usernames instead of root.
mysql -h INSTANCE_IP -u root -p
Enter your password and you’re back in MySQL. Take a look at the data you entered previously into this database using:
USE guestbook;
SELECT * FROM entries;
You can now create a MySQL database in the cloud and connect to it from a Linux command line and a VM. Go do something creative and useful with it!
Cleaning up
There are charges for Cloud SQL, Compute Engine instances and drives, and static IPs, so let’s clean up our work to stop accumulating these charges.
If you no longer need the project you did this work in, the easiest way to stop everything is to delete the project. Alternatively, you can stop each of the services by following the steps below:
If you’re using the interactive tutorials, they’ll point out how to delete everything they create.
So what now?
As a reminder, you can be guided through all of the steps here by the interactive tutorials below:
- Create a MySQL instance with Cloud SQL
- Connect to a Cloud SQL for MySQL instance from a Compute Engine virtual machine
What are you ready to explore next? Here are some suggestions:
- Did you forget your MySQL password? (Can you guess why this is first in the list?) Here’s more details on users and passwords.
- You can also do this with PostgreSQL and SQL Server instances.
- More on IP addresses and static IP addresses.
- If you want more practice creating a VM, there’s an entire interactive tutorial that shows how to create a VM.
- You can also explore more advanced features like provisioning a high availability (HA) instance and creating read replicas that can be used for disaster recovery and read scaling.